
Kids OK with adultESP32Level 2/3
12 m LiDAR Radar
A LiDAR on a servo sweeps 0–180° and the ESP32 draws every reading as a dot on a live radar map.
Kids OK, with an adult
DIY project. Children must build this only with an adult (16+ years) beside them at all times. Not suitable for children under 8 years.
Check the LiDAR wire colours against its datasheet. It uses an eye-safe Class 1 laser, but never look into it on purpose.
Strictly follow the description given with this video.
Video
The video link will be added here soon.
How it works
- The servo sweeps the LiDAR from 0° to 180° and back.
- The LiDAR measures distance up to 12 m, 100 times a second, over UART.
- The ESP32 pairs each distance with the servo angle.
- Each pair becomes a dot on the radar map.
Parts you need
- LiDAR distance sensor (0.1–12 m, UART)× 1Buy
- ESP32 development board (30-pin)× 1Buy
- Micro servo (180°)× 1Buy
- 5V 2A adapter, breadboard power rail, jumper wires× 1Buy
Kit for this projectPrice on request
Get the kitWiring
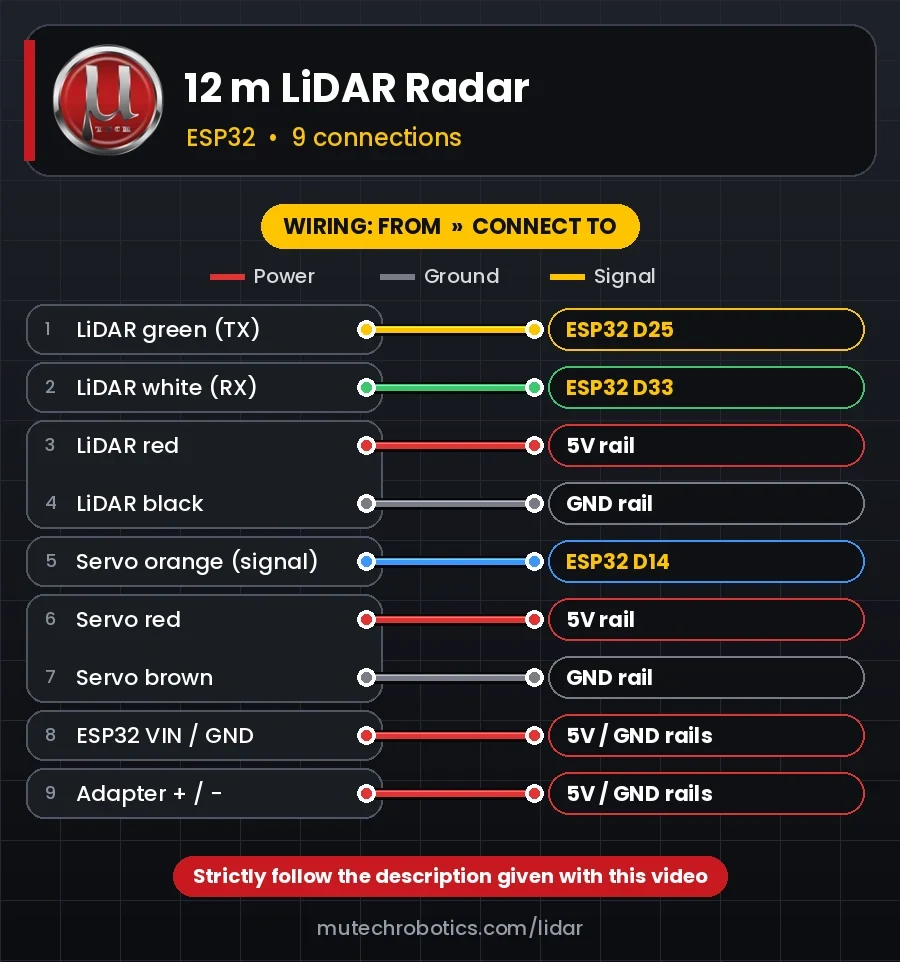
PowerGroundSignal
| # | From | Connect to |
|---|---|---|
| 1 Signal | LiDAR green (TX) | ESP32 D25 |
| 2 Signal | LiDAR white (RX) | ESP32 D33 |
| 3 Power | LiDAR red | 5V rail |
| 4 Ground | LiDAR black | GND rail |
| 5 Signal | Servo orange (signal) | ESP32 D14 |
| 6 Power | Servo red | 5V rail |
| 7 Ground | Servo brown | GND rail |
| 8 Power | ESP32 VIN / GND | 5V / GND rails |
| 9 Power | Adapter + / − | 5V / GND rails |
3D print files
- LiDAR cradleSettings in the STL zip READMELink at launch
- Servo baseSettings in the STL zip READMELink at launch
Code
The tested Arduino / ESP32 code for this project will be posted here, ready to copy.